• Hello guest! Are you a Tegu enthusiast? If so, we invite you to join our community! Our site is specifically designed for you and it's a great place for Tegu enthusiasts to meet online. Once you join you'll be able to post messages, upload pictures of your Tegu and enclosure and have a great time with other Tegu fans. Sign up today! If you have any questions, problems, or other concerns email [email protected]!

Early design thoughts

Odonata

Member
Messages
90
Location
Boulder, CO
So I have a long time to think about the type of enclosure that I want to build. I have researched most of the threads that have pictures on this site and looked a fair bit elsewhere, to include commercial options. From my research I have some initial ideas that I want to include in my design. I am not specifically looking to create a low cost enclosure, but want to make sensible decisions when acquiring some of the materials.

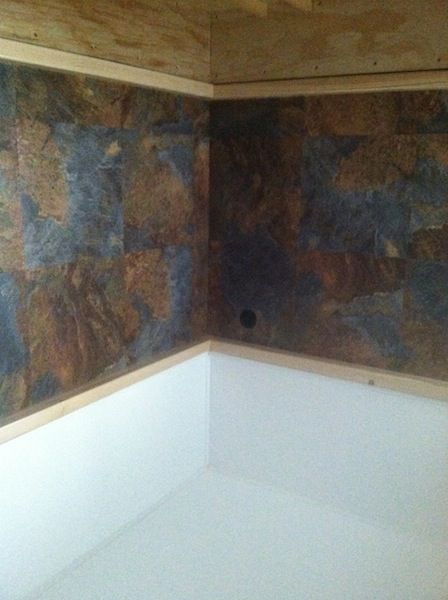
I am leaning towards creating something with a metal/vinyl frame, around a 1 foot high base (I think of this as a large bin 8-10' in length at least 3' in width, and 1' high). I would like everything to be waterproof. Total height of enclosure around 4'.

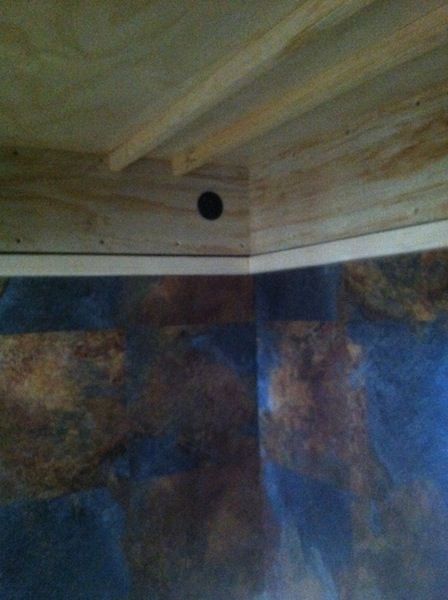
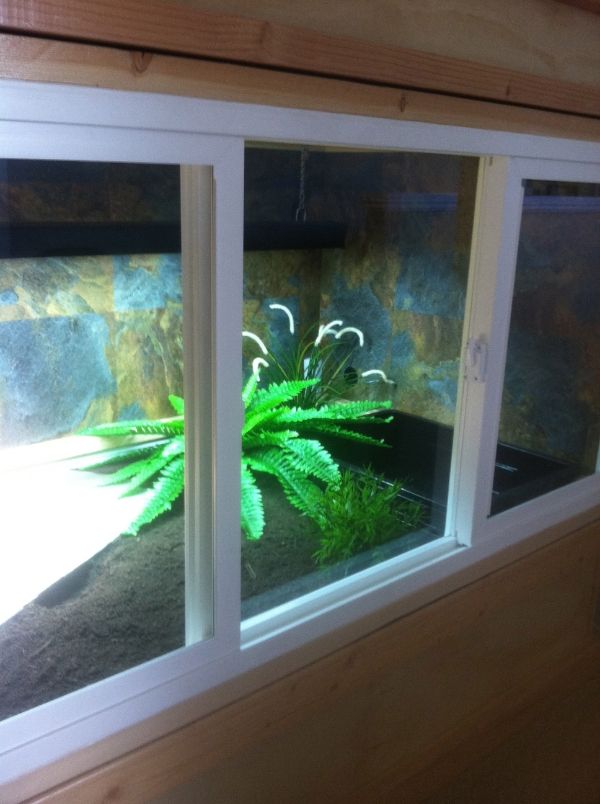
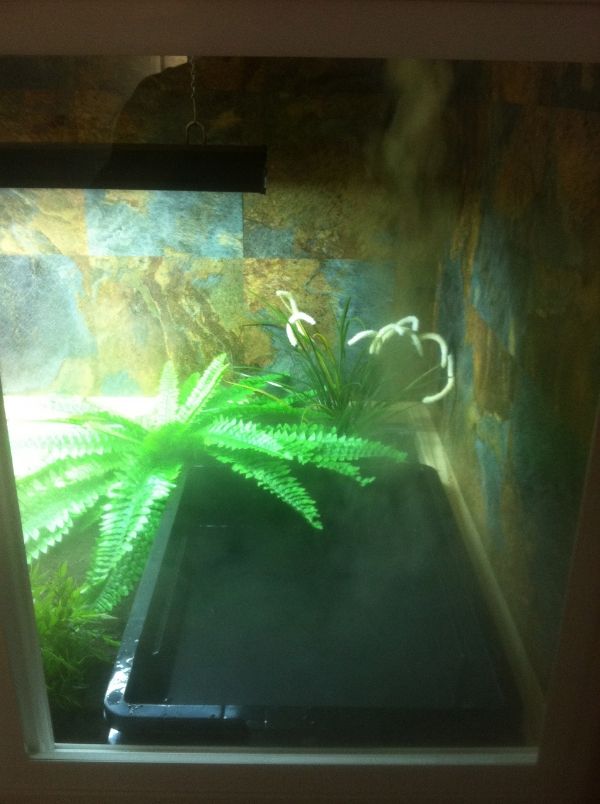
My initial thoughts are that I will reinforce the bin with a metal frame and use vinyl window frames for the front and sides of the enclosure, that will be affixed to the base (sliding windows on the front). I am not sure what material I will use for the lid - again probably look for something existing that I can tailor to this use.

A few questions to those with creative talent:

Can you think of a product that I could source that would fit the bill for the base of this build. I am thinking of looking at container solutions or having someone lay up a base out of fiberglass.

If I use vinyl windows for the sides and have a sealed top, is it better for me to build in vents on the sides (maybe a spacer between the lip of the bin and window with venting, could be on the bottom or top of the frames) or into the lid of the enclosure? Is cross venting a consideration?

I want the finished product to both show off my Tegu and to look like an attractive addition to the room it is in.

Once I have solidified my ideas a bit more I will do a mock up of the proposed enclosure and post that for comments. This is a longer term project though so it may be a while!

Thanks for any input.
 

Zamnan

New Member
Messages
5
Thats nice information you have shared.
I am new in this forum and i was looking about a solution and after reading your post it help me allot. Thanks for your sharing man.
 

Odonata

Member
Messages
90
Location
Boulder, CO
So Shadow has been hibernating since around the end of October. The drop temperature and humidity are maintained electronically so there has been nothing to do but occasionally dust off the enclosure. I did check on him two weeks ago as I had a weird feeling and wanted to be sure he was alive in there. Not only was he alive, but entirely unhappy at being woken up. His weight is good, and amazingly active for an animal that basically has not moved for 5 months (posturing and hissing). I took the opportunity to ensure that the substrate he was buried in had the necessary moisture since it is under a large slab in the corner and he then went back to sleep.

In the meantime on the enclosure front I am just starting construction, as I suspect that I will need to get it completed within the next couple of weeks. I started off by identifying a location in the house to place something no smaller than 6'x4'. I realize this may not be big enough for him as an adult, but I am looking at acquiring some Ackies over the summer so they will likely end up in here once Shadow grows out of it. The location I decided upon was the top of the stairs as it is frequented a lot and highly visible yet not in the midst of excessive commotion. I first had to build out the landing as there was not sufficient space. I added 4' to the landing by hanging it out over the hallway below. I installed a new dedicated power circuit to support all the electrics. I am just replacing the windows that are above this space and stairwell with new energy efficient vinyl units (part of another project I am just wrapping up).

The window project made me decide to order a custom vinyl window to use as the front of the enclosure. I have read plenty of posts where people dismiss sliding windows due to the issue of dirt accumulation in the tracks. I thought about this and still decided I would give it a shot. I ordered a 3 pane unit that has two sliding windows one on each end. The unit itself will obviously be installed reversed from a window perspective so the latches are on the outside of the enclosure. The tracks are on the outside so the sliding windows will always open. The caveat being if there is so much dirt piled up on the inside it will then fall into the track when it is opened. The unit just arrived and I have picked up the rest of the materials for construction. Basically I will build 4 layers (for ease of diss-assembly and moving through door frames should the need arise). The bottom is simply a 24" high reinforced cabinet that will store the electrics, water reservoir, backup power, etc. Then there will be a short section 14"-16" deep that is vinyl lined and sealed for substrate (I can replace this with a deeper section for the Ackies later if they end up in here). The section with the window will sit on that (window is 28" high) and be around 32", and then there will be a lid section that will house sensors, lights, etc. The electrics and water pipes will run up an internal conduit in one of the back corners.

I'll make sure to take pictures and update as I get going with it.
 

Odonata

Member
Messages
90
Location
Boulder, CO
I have been slacking on this project due to other demands on my time. That and there was no great sense of urgency as Shadow was not awake. His activity level post hibernation is really picking up though as is his appetite and I am having to get moving on this project. He is wanting out of his current enclosure more and more and eating/pooing in a serious fashion. I bathed him on Saturday and he had 2 massive poos. On Sunday he wanted to roam so I let him out, thinking he was unlikely to make a mess of anything, and he promptly climbed onto my bed and pooped! I could swear he looked right at me as if to say "what!" right as he relaxed post pooping activity (they look so serious right before they go).

Anyway back to the build. Here is the space:

IMG_0918.jpg


The window in the wall I recently installed, and the frame leaning against the wall i ordered to be the front of the enclosure. This weekend I almost completed the section that will hold the substrate. I decided to increase the height of it so that it can hold 18" of substrate, in case this gets re-purposed for something more into digging - that said Shadow loves to dig so I imagine will make good use of it. I have lined this section with vinyl shower panel and bonded it all with a fiberglass based adhesive, so it should be entirely watertight. I am still working on how I build the next layer that includes the window as I am wanting something visually appealing for the walls that isn't excessively expensive. I suspect I will tile the interior walls at this point. I'll post a pic of the substrate section once I take a picture of it.
 

Odonata

Member
Messages
90
Location
Boulder, CO
Substrate level is complete apart from varnishing the exterior. The interior is lined with shower paneling, sealed, and watertight. I hope to complete the next level with the window that is essentially the sides of the enclosure this weekend. As usual it all takes longer than one expects. The base will be built last as it is optional in some regards and the only purpose is to house the power items and water reservoir (assuming I don't just pipe mains water directly). Additionally the base will be built to height such that the entire enclosure is functional and aesthetically pleasing (personal perception of course!)

Substrate layer:

SubstrateLayer.jpg


Edit: I should add that I feel some pressure to get this done now that Shadow is up from hibernation and very active. He appears to be growing like a weed! I had him on the deck yesterday in the sun, and he spent a good amount of time roaming around. Amazing how the sunlight seems to supercharge them....
 

Odonata

Member
Messages
90
Location
Boulder, CO
Basically all done here except for hanging the lights, setting up the water/humidity system, and loading the substrate in.

Some pictures:

Mid Section.
Mid_Section.jpg


Front.
Finished_Enclosure.jpg


Inside 1.
Inside_1.jpg


Inside 2.
Inside_2.jpg


Inside 3.
Inside_3.jpg


I will post some final pictures with all the stuff inside once I have Shadow moved in.
 

Odonata

Member
Messages
90
Location
Boulder, CO
Some final photos of the finished enclosure. I will add one more update to this post with the list of things that I learned, since it might be useful to others planning on designing and building enclosures that are more than just a box. There were definitely many times I wish I had just kept it simple!

IMG_1006.jpg


IMG_1001.jpg


Shadow is still settling in....and not sure what to make of the plastic plants! They appear to provide good exercise since he likes to dig them up. the large tub is under the inlet for the humidity system and the enclosure takes on a very tropical look when it is running (which is almost never since it seems to not lose humidity, so that entire system, including the redundant part of it was way over engineered!). More on that stuff in a later update with the lessons learned on this project. Already think i will be making another one this coming winter, both to provide a larger enclosure and since I learned so much I would like to put some other ideas in play for future designs.
 

Odonata

Member
Messages
90
Location
Boulder, CO
Thank you!

A couple of pics of Shadow putting his new environment to use:

Hanging out - heat lamps off for picture.
IMG_1015.jpg


Using the bathroom facility!
IMG_1012.jpg


It has been very interesting to see the change in behavior with having moved him to the new enclosure. The first day he pretty much went about destroying everything, digging, thrashing about in the water, and generally didn't seem very happy. I decided to let him be. By day two he had established two burrows and an an interesting channel under the plants in the back corner to lie hidden in the shade. Interestingly he almost never covers up his burrows now and often will be in one with his head sticking out of the entrance. I assume this is due to the higher and more constant humidity level of the enclosure compared to previously. This is a bonus as we see him most of the day now. He makes full use of all the different areas of the enclosure, the bathroom, hiding in the shade, basking and and burrowing. His appetite has increased which I was not expecting. He has not shown any aggression or other changes.
 

Odonata

Member
Messages
90
Location
Boulder, CO
Lessons learned:

From a design standpoint building the enclosure in separate pieces worked very well. Both in terms of portability and flexibility. Being able to slide the lid off to work on electrical stuff without having to be inside the enclosure is very handy, or slide it off to stand full height in the base section. I put a strip of adhesive backed vinyl kick-board on the top of the joining surfaces (you can buy this in rolls as a trim in the flooring section of hardware stores and cut it down to the right width). This provides a waterproof hard sliding surface that allows the units to separate and slide without a lot of force (though considerably more than a tegu can exert).

Maintaining humidity in a well sealed enclosure is very easy. I went overkill on this as it had been so hard in the previous enclosure and it is totally unnecessary if you have a sufficient depth of substrate. I would certainly go with a good depth of substrate even if you have a tegu who does not burrow for this reason alone - probably a minimum of 12" preferably more, I have around 17" in mine. I went with organic topsoil mixed with sand and peat moss which holds burrows very well and compacts nicely also.

Temperature control and monitoring is very important in a well sealed enclosure. It is very easy to heat the enclosure excessively. In testing this became so apparent that I had to add additional vents and significantly change my lighting plan. I have made it so that there are multiple vents to allow heat to exit the enclosure which are adjustable since the need for this in full summer will be considerably different than at other times of the year. I am currently considering a thermostatically controlled vent system as a potential safeguard.

In relation to the previous point the Arcadia lighting is very nice, but runs very hot, something to think about.

The sliding glass window unit seems to work very well. It is high enough in the front that it does not get any real amount of dirt thrown up in the tracks and although that happened on the first day, it did not affect the unit from working due to its orientation, and a quick vacuum had it right back to clean. I really like how nice they look and the functionality. I would use this idea again.

These would be the main points that I think might help others out. If anyone has any questions on why I chose to build this type of enclosure or about the practical side of doing so feel free to ask. Lastly, I would say - plan on everything taking longer than you expect!

All that said building your own enclosure is very rewarding.
 

Penny&Dollar

Member
Messages
96
Hi what's up? First of all let me start off by saying this is the best enclosure I've seen. I was wondering if you can give me a list and size of cuts and materials used. Myself and my blues would really appreciate it, I have more then enough time to build since their still small I have about six months to build. I've seen plenty of enclosure but this one seem to be the best one and I love that its three pcs so I can definitely fit it in my masters. Thnx for your time and hope to hear from you, and once again BEST ENCLOSURE I've seen GREAT JOB building it.
 

Odonata

Member
Messages
90
Location
Boulder, CO
Hi what's up? First of all let me start off by saying this is the best enclosure I've seen. I was wondering if you can give me a list and size of cuts and materials used. Myself and my blues would really appreciate it, I have more then enough time to build since their still small I have about six months to build. I've seen plenty of enclosure but this one seem to be the best one and I love that its three pcs so I can definitely fit it in my masters. Thnx for your time and hope to hear from you, and once again BEST ENCLOSURE I've seen GREAT JOB building it.

Thanks for the comments! As an enclosure it has worked out very well.

I can certainly list all of the materials if that is what you are looking for, and I guess create a step by step walk-through of how i built it. It took me a while to put it all together, partly as I was in no rush initially and I wanted the finished product to look professional. It might help to know what tools you have available, as that will alter the material requirements a bit. I used a large table saw to strip lengths down and set up stands along with clamps and long straight edges for cutting the large sheets accurately. You could have all these pieces cut to size initially if you don't have similar equipment available. Other than that I used a nail gun, screw gun, couple of different adhesives, and other common tools that I am sure you would have. What are the external dimensions you want the enclosure to be?
 

Penny&Dollar

Member
Messages
96
Well first of all let me say thank you so much for getting back to me and willing to help me (THANK YOU) I have a saw,nail guns, screw gun but if you can give me the cuts I can have my local store cut them to size for me as for size im guessing 6x3x3 unless I can do two feet high by 6feet long and 3 feet wide that way I don't have to keep any lights inside and risk them getting burnd like I said im not in a rush to build cause they are still small and I can take my time and built it section by section and have that perfect finish like you have and on top of that it will have a couple of months to air out. Like I said THANK YOU very much
 

Penny&Dollar

Member
Messages
96
Thanks I really appreciate it I just wanna build something since I got free time now ( vacation) lolol ...and I've been looking at the pictures a lot I mean a lot did you pipe the water tub or do you take it out and change everyday...well can't wait for the blue print to get started. Thanks I.O.U
 

Tyler137

Member
Messages
75
Location
Connecticut
Sorry been away for a few days and catching up - I'll pm you and will pull out my drawings that I used. Thinking I can modify those and scan them pretty easily. I'll also post the drawings along with the materials list.
Can you post the materials list here? Trying to get the same dimensions as penny as well.
 

Odonata

Member
Messages
90
Location
Boulder, CO
I will post materials up here - sorry been MIA here due to flooding in Boulder. My house was not hit as bad as many, but my basement was flooded and I have a major cleanup/renovation project underway. Thankfully all the reptiles are upstairs and I got pumps in place prior to having too much accumulation. I will try and get the materials and details posted this weekend!
 

Members online

No members online now.

Forum statistics

Threads
20,101
Messages
177,818
Members
10,331
Latest member
T.C.
Top