- Messages
- 612
- Location
- Missouri
Ok, time for the second tutorial. This time I'll be guiding you through your process on making a 8'x4'x4' cage.
Cage dimension: 96"x48"x48", 8 feet long, 4 feet tall, 4 feet wide
Total Build Cost: $150 (rough estimate)
Supplies:
2"x"4's (untreated, quantity depending)
- $2 per 8'
5 8'x4' planks of wood (different types of wood may be used)
- $10 a plank, $50 total
4 300pound rate caster wheels
- $2 a piece
3 1"x2"s
- $1.50 a piece (different types of wood may be used)
1 gallon of Acrylic Exterior House Paint
- $7 (Buy the "miss mixed" paint. Cheaper and never been used)
1 half gallon of Killz
- $5 (any other primer will do)
4 tubes of Caulk
-$5
1 Extension cord
- $.88 (length may vary) At LEAST 16 guage wire!
2 porcelain light fixtures
- $2 per fixture
1 light fixture extender (DWV Coupling)
- $3
1 roll of green garden plastic mesh (other types of mesh can be used)
- $10
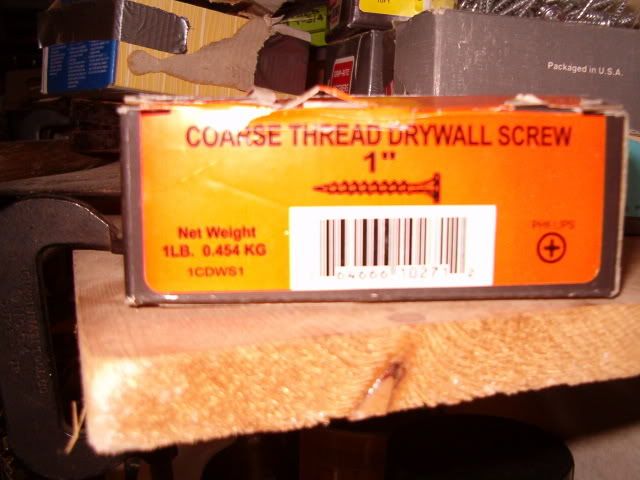
1 box of 1" drywall screws (length may vary, types may vary)
- $3
3 Door pull handle (optional)
- $3 (price may vary)
4 door locks (optional)
- $4 (price may vary)
4 door hinges (quantity and style vary)
- $4 (price may vary)
Other common house hold supplies:
4Ã?¢ââ??¬Ã? screws
3Ã?¢ââ??¬Ã? screws
Square
Caulking gun
Screwdrivers
Screw Gun
Screw Gun Bits
Drill gun
Drill bits
Counter Sinks
Table Saw (jigsaw, hand saw, circular saw, etc. can work just fine)
Other screws/nails
Extension Cord(s)
Air Compressor
Paint Brushes, Paint Pan, and Painting cloths
Paint Roller
Other supplies can/will/may be used in the making of this enclosure.
Staple Gun and Staples
Step 1:
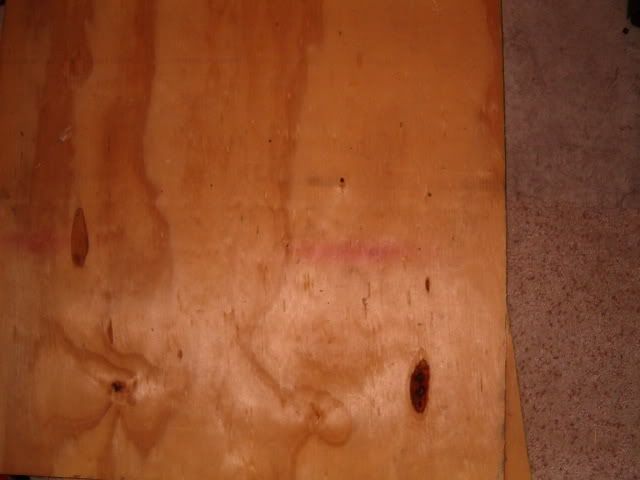
First off we need to cut the planks of wood. Obviously since we bought big 8Ã?¢ââ??‰â??¢x4Ã?¢ââ??‰â??¢ planks, there wont be to much cutting. The top, back, bottom, wont need to be cut. The 2 sides and the front will need to be cut. Depending on how well you measured and how well everything fits together, you will only need to make 2 cuts to 2 planks of 8Ã?¢ââ??‰â??¢x4Ã?¢ââ??‰â??¢ plywood. First youÃ?¢ââ??‰â??¢ll make a cut on one of the plants in the middle creating two (2) pieces of 4Ã?¢ââ??‰â??¢x4Ã?¢ââ??‰â??¢ planks. The other plank, for the front, will differ among the maker. If you choose to make a bigger door, or a different type of door, then you can make the door bigger, and what not. I cut the plank to be 2Ã?¢ââ??‰â??¢x8Ã?¢ââ??‰â??¢. Since the planks I bought, generic wood planks from home depot, are pre-sanded, they donÃ?¢ââ??‰â??¢t need to be sanded. Just sent the cut planks and the whole planks to the side. HereÃ?¢ââ??‰â??¢s a picture of the wood I chose to use.
Step 2:
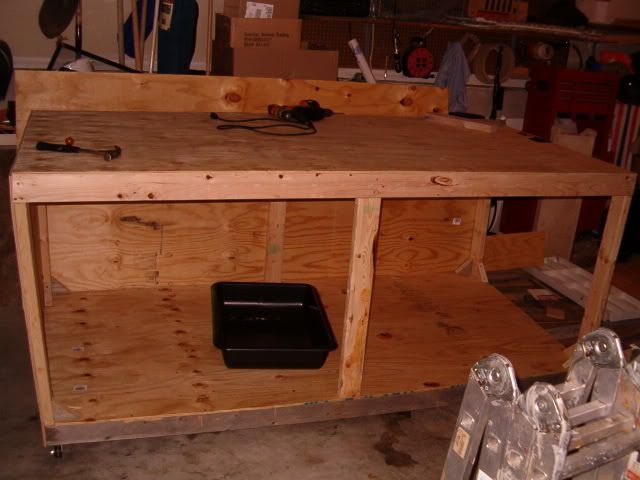
This step deals with the frame process of the cage. When making the frame, you must keep in mind what you are keeping in the cage. In my case, IÃ?¢ââ??‰â??¢m keeping a couple tegus along with 2Ã?¢ââ??‰â??¢ of cypress mulch. ItÃ?¢ââ??‰â??¢s going to be extremely heavy so your frame MUST be able to withstand the weight. Basically what I did is create a box frame with 2x4Ã?¢ââ??‰â??¢s. Use 4Ã?¢ââ??¬Ã? screws to screw the frame together. Put at least 2 in all board on the corners and the supports. You need to make the frame square. ItÃ?¢ââ??‰â??¢s hard to do, but if its square, itÃ?¢ââ??‰â??¢ll be easier to work with. You can square the frame by getting a square tool and putting pressure on the frame to make the corners match 90* (degree angle). If its to hard to push to make it square, loosen the screws until its square, then tighten the screws. Check the angles of you cuts to ensure itÃ?¢ââ??‰â??¢ll be perfect when squaring.
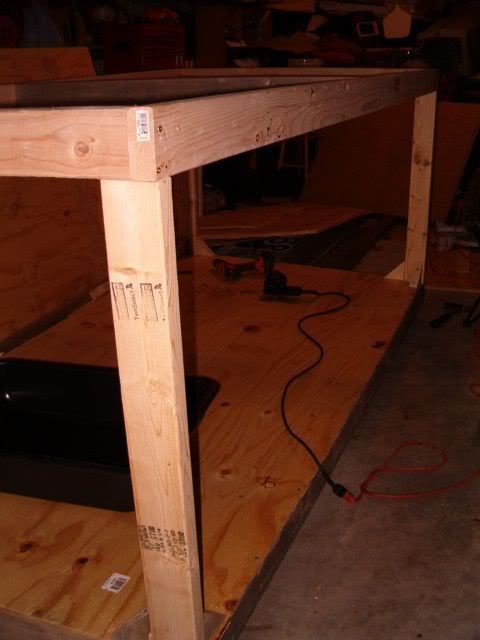
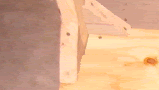
After I have the generic frame, I added supports to the side. For the supports I put straight 2x4Ã?¢ââ??‰â??¢s in the center going vertically and horizontally. Picture follows for reference.
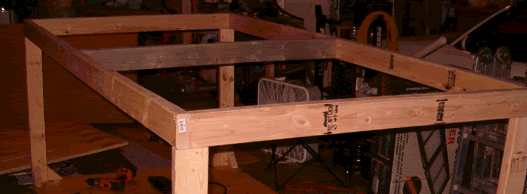
Now on the number of supports to use is all up to you. Keeping in mind how much weight will be in the cage. I chose to put 2 supports on top, 1 on the back of the cage, 1 on the front, and 4 on the bottom. You will need to put more on the bottom due to thatÃ?¢ââ??‰â??¢s where the weight will be. I chose to put 2 on the top because of the fact something may be set on top. In the picture above shows the top support for reference.
Step 3:
Before screwing on your planks, figure out which side will be your bottom, tip the cage over, its time to install your caster wheels. The wheels will allow you to wheel around your cage. My cage is an indoor/outdoor cage. I keep it in the garage when in use, and then I can roll it outside for my tegus to get some sun, or for storage in winter. Put 1 wheel on each corner, use 3Ã?¢ââ??¬Ã? screws to faster the wheel.

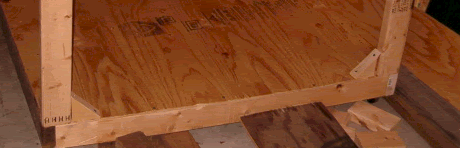
After we have the basic frame, now comes the wood plank setting. You will want to put the bottom wood plank inside the frame so your reptile will be able to have a smooth surface to walk on. You must trim your corns so itÃ?¢ââ??‰â??¢ll slide down on the 2x4Ã?¢ââ??‰â??¢s. On each corner youÃ?¢ââ??‰â??¢ll want to cut out a 2x4 pattern. In order to figure out where, you must measure your frame to find out where to cut. Easiest method to cut is to use a jigsaw.
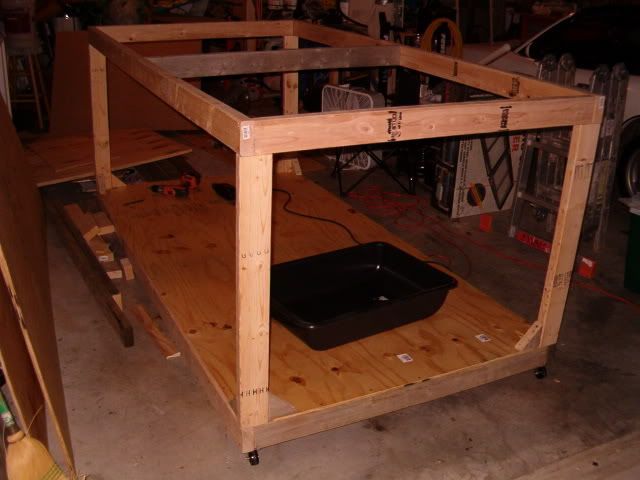
After the bottom plank is set. Screw it onto the frame using the 1Ã?¢ââ??¬Ã? drywall screws. Use a lot of screws, itÃ?¢ââ??‰â??¢ll make it stable. Now on the corner posts of the side of the cage, I put a 2x4 triangle on the bottom to add support to the supports. The following picture shows the concept.
Now screw on the top plank, the back plank, the front plank, and the 2 side planks using your 1Ã?¢ââ??¬Ã? drywall screws.
Step 4:
The front door, and the side door. Measure the front of the cage to determine the size of door needed. Simply cut the 1x2Ã?¢ââ??‰â??¢s and make a 4 sided rectangle. Use 3Ã?¢ââ??¬Ã? screws to fasten the wood together. Add supports in the middle of the frame to allow for more support to the door. After the frame with supports is finished.
Now you will add your mesh. I chose to use the green garden mesh with 1Ã?¢ââ??¬Ã? squares. I chose this type of mesh because itÃ?¢ââ??‰â??¢s commonly used with iguanas. ItÃ?¢ââ??‰â??¢s safe on toes and toenails. I hesitate using metal due to cutting off toes and ripping out toenails.
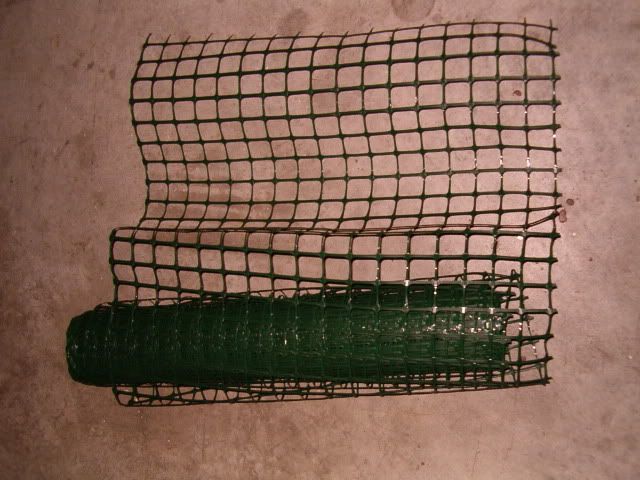
Attaching the mesh it easy. Lay the mesh over your frame to determine where you need to cut. Cut out the piece you need. Staple the piece onto your frame. Make sure there are no big gaps otherwise your lizard may be able to pull a staple out and escape.
The side door is simple. Just trim a square out of one (or two) of the side(s) using a jigsaw. Add 2 hinges and 2 locks to allow for a locking hinged door. An optional handle can be used.
I added a sunroof to my cage so then I can lift the top off to allow the sun to shine down on my tegus. I just cut out a BIG square on the top of the cage plank, added supports under the hole so the lid doesnÃ?¢ââ??‰â??¢t fall through, and added a handle to the lift able lid for easy opening. There ya have it, a sunroof.
Step 5:
Attaching the frame door to the front of the cage. Set the door on the front, add 2-3 hinges on the bottom, and put 2 locks on the top. A handle in the middle is optional, but always makes it look nice and easier to open.
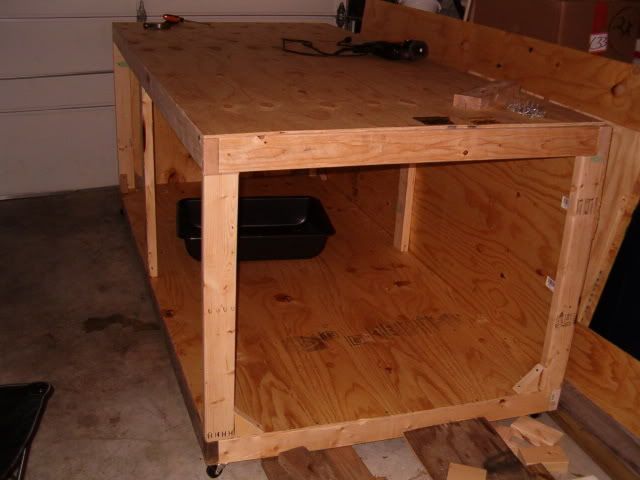
Step 6:
Now your basic cage is made. Now what do we do? PAINT.
First off use a compressor to spray any access wood shavings and dust off and out of the cage. Once the cage is clean, its time to prime.
Priming is very simple. I used a primer called Killz.
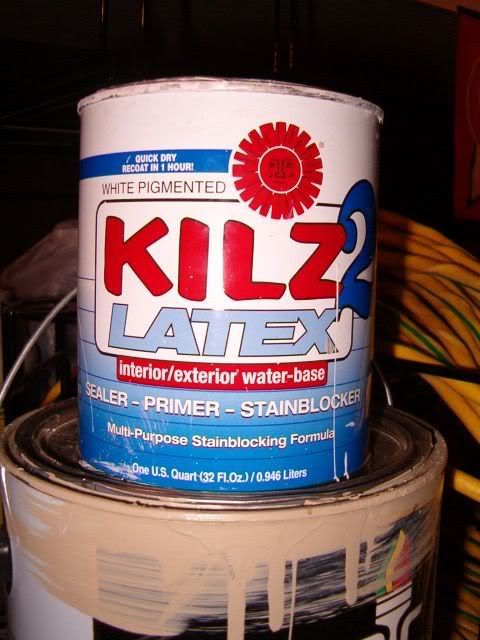
What the primer does is allow for the paint to stick better, and it helps seal the wood and prevent stains. 2 coats of primer is needed.
After primer comes paint. I used Ã?¢ââ??¬Ã?â??miss mixedÃ?¢ââ??¬Ã? paint. What that means is a customer bought the paint, but it didnÃ?¢ââ??‰â??¢t match the color they wanted. ItÃ?¢ââ??‰â??¢s cheaper to buy this type because otherwise itÃ?¢ââ??‰â??¢ll cost you around $20 to have a special mixed paint. You must use an exterior paint. The cage will be put to some extreme weather. IE: Heat, water, stress. So if you donÃ?¢ââ??‰â??¢t want chipping, use exterior paint. I chose a light tan Acrylic outdoor paint.
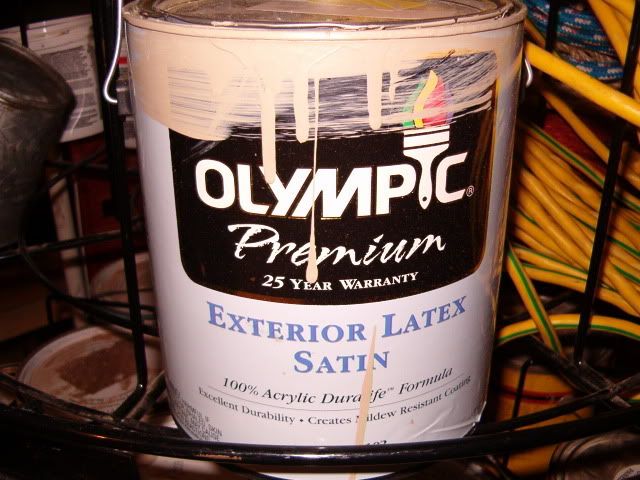
For the edges and corners, use a paintbrush. For the big open areas, use a paint roller. Protect the garage floor (or wherever) with a piece of painting canvas or an old sheet. You need at least 2 coats of paint, 3 may be used. Paint it on thick, watch for runs (drips).
Step 7:
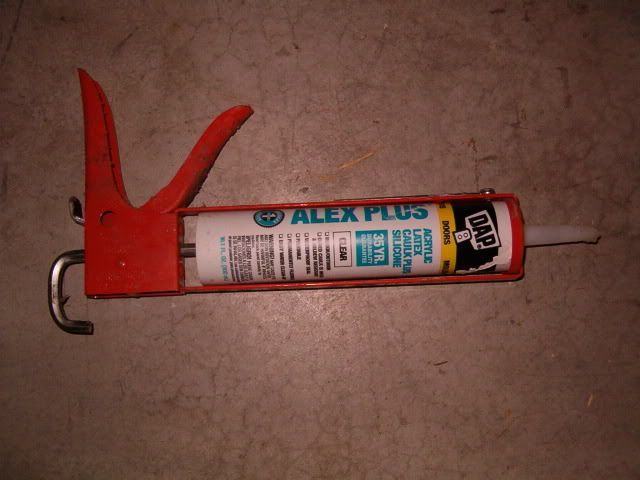
Caulking. Now that we have our basic painted cage, we need to seal those edges up using some caulk. I chose to use just a regular indoor/outdoor use caulking. Just put a small bead around every edge in the inside of the cage. Use your finger to press the caulk into the gaps. Allow 24 hours before any water can touch it.
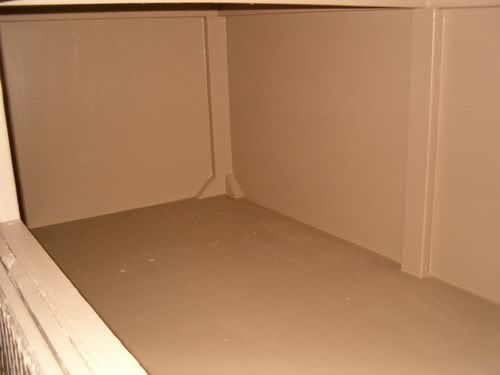
Front view with door up
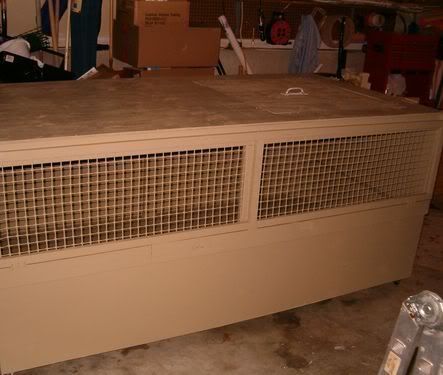
Side view with door up
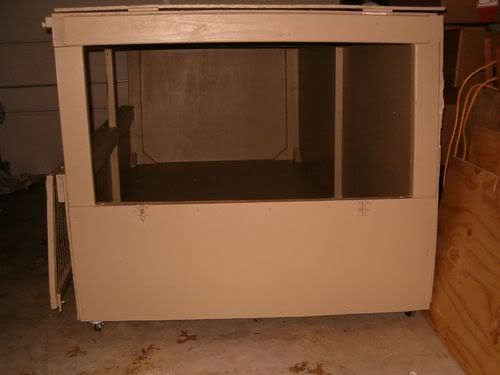
Inside view through the side
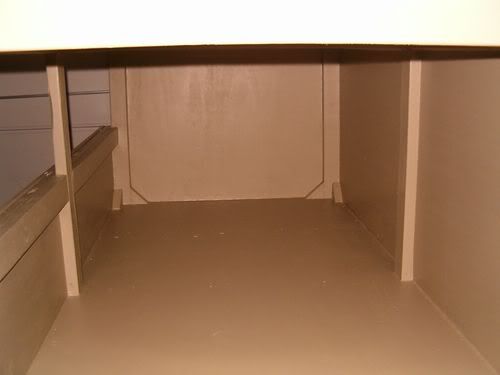
Inside view through the front
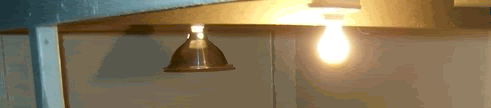
Step 8:
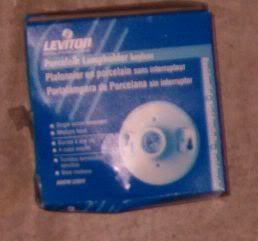
Lighting. We need to install the lighting. For this install, you will need a screwdriver, drill bits, 4 4Ã?¢ââ??¬Ã? screws, 1 3Ã?¢ââ??¬Ã? DWV coupling, the 2 porcelain fixtures, extension cord, and extra extension cord.
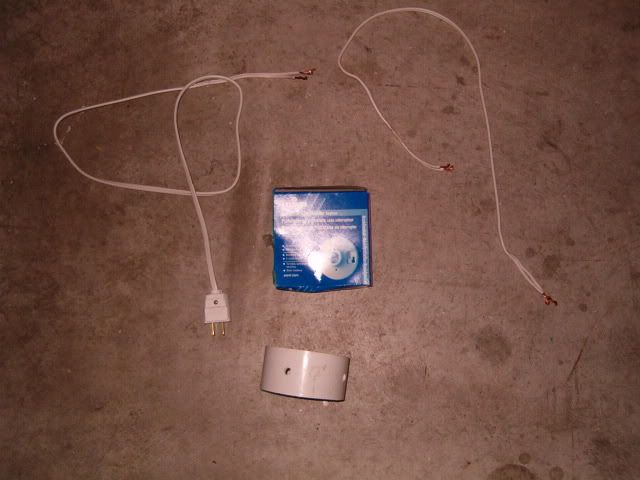
Start by taking your 3Ã?¢ââ??¬Ã? DWV coupling and sawing it in half creating 2 cylinders.

Wire-up your porcelain fixtures using the extension cord (cut off the side you extend with keeping the side you plug into your wall). Use the directions! Put the coupling on the back of the fixture, and screw onto the ceiling. Thread the cables through a small wall you need to drill on the back of the cage. Use staples to staple the extension cord so it looks sleek and nothing can pull on it.
Step 9:
Decorate your cage. Add what ever you want to it. DonÃ?¢ââ??‰â??¢t worry about chipping of the paint.
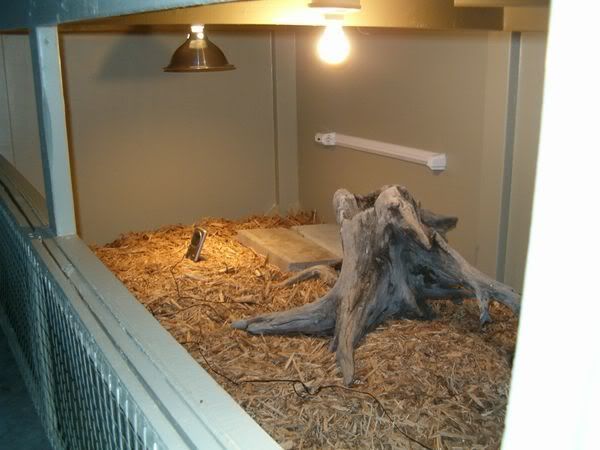

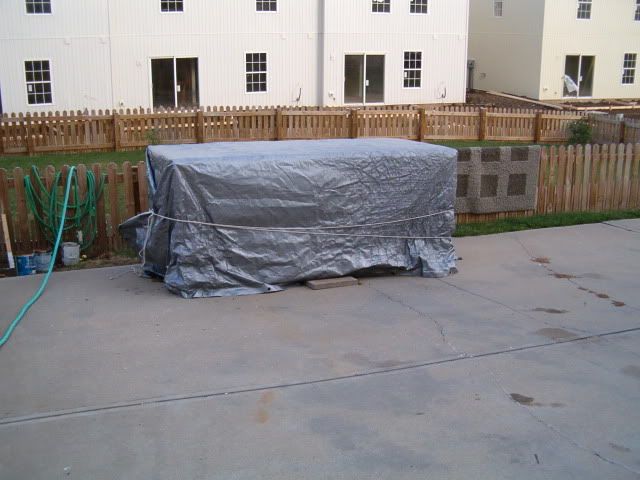
If you wheel it outside for the winter, just cover it up with a tarp leaving the dÃ?Æ?Ã?©cor inside. I did take the lighting out though.
There ya have it! Your cage is finally done!
Cage dimension: 96"x48"x48", 8 feet long, 4 feet tall, 4 feet wide
Total Build Cost: $150 (rough estimate)
Supplies:
2"x"4's (untreated, quantity depending)
- $2 per 8'
5 8'x4' planks of wood (different types of wood may be used)
- $10 a plank, $50 total
4 300pound rate caster wheels
- $2 a piece
3 1"x2"s
- $1.50 a piece (different types of wood may be used)
1 gallon of Acrylic Exterior House Paint
- $7 (Buy the "miss mixed" paint. Cheaper and never been used)
1 half gallon of Killz
- $5 (any other primer will do)
4 tubes of Caulk
-$5
1 Extension cord
- $.88 (length may vary) At LEAST 16 guage wire!
2 porcelain light fixtures
- $2 per fixture
1 light fixture extender (DWV Coupling)
- $3
1 roll of green garden plastic mesh (other types of mesh can be used)
- $10
1 box of 1" drywall screws (length may vary, types may vary)
- $3
3 Door pull handle (optional)
- $3 (price may vary)
4 door locks (optional)
- $4 (price may vary)
4 door hinges (quantity and style vary)
- $4 (price may vary)
Other common house hold supplies:
4Ã?¢ââ??¬Ã? screws
3Ã?¢ââ??¬Ã? screws
Square
Caulking gun
Screwdrivers
Screw Gun
Screw Gun Bits
Drill gun
Drill bits
Counter Sinks
Table Saw (jigsaw, hand saw, circular saw, etc. can work just fine)
Other screws/nails
Extension Cord(s)
Air Compressor
Paint Brushes, Paint Pan, and Painting cloths
Paint Roller
Other supplies can/will/may be used in the making of this enclosure.
Staple Gun and Staples
Step 1:
First off we need to cut the planks of wood. Obviously since we bought big 8Ã?¢ââ??‰â??¢x4Ã?¢ââ??‰â??¢ planks, there wont be to much cutting. The top, back, bottom, wont need to be cut. The 2 sides and the front will need to be cut. Depending on how well you measured and how well everything fits together, you will only need to make 2 cuts to 2 planks of 8Ã?¢ââ??‰â??¢x4Ã?¢ââ??‰â??¢ plywood. First youÃ?¢ââ??‰â??¢ll make a cut on one of the plants in the middle creating two (2) pieces of 4Ã?¢ââ??‰â??¢x4Ã?¢ââ??‰â??¢ planks. The other plank, for the front, will differ among the maker. If you choose to make a bigger door, or a different type of door, then you can make the door bigger, and what not. I cut the plank to be 2Ã?¢ââ??‰â??¢x8Ã?¢ââ??‰â??¢. Since the planks I bought, generic wood planks from home depot, are pre-sanded, they donÃ?¢ââ??‰â??¢t need to be sanded. Just sent the cut planks and the whole planks to the side. HereÃ?¢ââ??‰â??¢s a picture of the wood I chose to use.
Step 2:
This step deals with the frame process of the cage. When making the frame, you must keep in mind what you are keeping in the cage. In my case, IÃ?¢ââ??‰â??¢m keeping a couple tegus along with 2Ã?¢ââ??‰â??¢ of cypress mulch. ItÃ?¢ââ??‰â??¢s going to be extremely heavy so your frame MUST be able to withstand the weight. Basically what I did is create a box frame with 2x4Ã?¢ââ??‰â??¢s. Use 4Ã?¢ââ??¬Ã? screws to screw the frame together. Put at least 2 in all board on the corners and the supports. You need to make the frame square. ItÃ?¢ââ??‰â??¢s hard to do, but if its square, itÃ?¢ââ??‰â??¢ll be easier to work with. You can square the frame by getting a square tool and putting pressure on the frame to make the corners match 90* (degree angle). If its to hard to push to make it square, loosen the screws until its square, then tighten the screws. Check the angles of you cuts to ensure itÃ?¢ââ??‰â??¢ll be perfect when squaring.
After I have the generic frame, I added supports to the side. For the supports I put straight 2x4Ã?¢ââ??‰â??¢s in the center going vertically and horizontally. Picture follows for reference.
Now on the number of supports to use is all up to you. Keeping in mind how much weight will be in the cage. I chose to put 2 supports on top, 1 on the back of the cage, 1 on the front, and 4 on the bottom. You will need to put more on the bottom due to thatÃ?¢ââ??‰â??¢s where the weight will be. I chose to put 2 on the top because of the fact something may be set on top. In the picture above shows the top support for reference.
Step 3:
Before screwing on your planks, figure out which side will be your bottom, tip the cage over, its time to install your caster wheels. The wheels will allow you to wheel around your cage. My cage is an indoor/outdoor cage. I keep it in the garage when in use, and then I can roll it outside for my tegus to get some sun, or for storage in winter. Put 1 wheel on each corner, use 3Ã?¢ââ??¬Ã? screws to faster the wheel.
After we have the basic frame, now comes the wood plank setting. You will want to put the bottom wood plank inside the frame so your reptile will be able to have a smooth surface to walk on. You must trim your corns so itÃ?¢ââ??‰â??¢ll slide down on the 2x4Ã?¢ââ??‰â??¢s. On each corner youÃ?¢ââ??‰â??¢ll want to cut out a 2x4 pattern. In order to figure out where, you must measure your frame to find out where to cut. Easiest method to cut is to use a jigsaw.
After the bottom plank is set. Screw it onto the frame using the 1Ã?¢ââ??¬Ã? drywall screws. Use a lot of screws, itÃ?¢ââ??‰â??¢ll make it stable. Now on the corner posts of the side of the cage, I put a 2x4 triangle on the bottom to add support to the supports. The following picture shows the concept.
Now screw on the top plank, the back plank, the front plank, and the 2 side planks using your 1Ã?¢ââ??¬Ã? drywall screws.
Step 4:
The front door, and the side door. Measure the front of the cage to determine the size of door needed. Simply cut the 1x2Ã?¢ââ??‰â??¢s and make a 4 sided rectangle. Use 3Ã?¢ââ??¬Ã? screws to fasten the wood together. Add supports in the middle of the frame to allow for more support to the door. After the frame with supports is finished.
Now you will add your mesh. I chose to use the green garden mesh with 1Ã?¢ââ??¬Ã? squares. I chose this type of mesh because itÃ?¢ââ??‰â??¢s commonly used with iguanas. ItÃ?¢ââ??‰â??¢s safe on toes and toenails. I hesitate using metal due to cutting off toes and ripping out toenails.
Attaching the mesh it easy. Lay the mesh over your frame to determine where you need to cut. Cut out the piece you need. Staple the piece onto your frame. Make sure there are no big gaps otherwise your lizard may be able to pull a staple out and escape.
The side door is simple. Just trim a square out of one (or two) of the side(s) using a jigsaw. Add 2 hinges and 2 locks to allow for a locking hinged door. An optional handle can be used.
I added a sunroof to my cage so then I can lift the top off to allow the sun to shine down on my tegus. I just cut out a BIG square on the top of the cage plank, added supports under the hole so the lid doesnÃ?¢ââ??‰â??¢t fall through, and added a handle to the lift able lid for easy opening. There ya have it, a sunroof.
Step 5:
Attaching the frame door to the front of the cage. Set the door on the front, add 2-3 hinges on the bottom, and put 2 locks on the top. A handle in the middle is optional, but always makes it look nice and easier to open.
Step 6:
Now your basic cage is made. Now what do we do? PAINT.
First off use a compressor to spray any access wood shavings and dust off and out of the cage. Once the cage is clean, its time to prime.
Priming is very simple. I used a primer called Killz.
What the primer does is allow for the paint to stick better, and it helps seal the wood and prevent stains. 2 coats of primer is needed.
After primer comes paint. I used Ã?¢ââ??¬Ã?â??miss mixedÃ?¢ââ??¬Ã? paint. What that means is a customer bought the paint, but it didnÃ?¢ââ??‰â??¢t match the color they wanted. ItÃ?¢ââ??‰â??¢s cheaper to buy this type because otherwise itÃ?¢ââ??‰â??¢ll cost you around $20 to have a special mixed paint. You must use an exterior paint. The cage will be put to some extreme weather. IE: Heat, water, stress. So if you donÃ?¢ââ??‰â??¢t want chipping, use exterior paint. I chose a light tan Acrylic outdoor paint.
For the edges and corners, use a paintbrush. For the big open areas, use a paint roller. Protect the garage floor (or wherever) with a piece of painting canvas or an old sheet. You need at least 2 coats of paint, 3 may be used. Paint it on thick, watch for runs (drips).
Step 7:
Caulking. Now that we have our basic painted cage, we need to seal those edges up using some caulk. I chose to use just a regular indoor/outdoor use caulking. Just put a small bead around every edge in the inside of the cage. Use your finger to press the caulk into the gaps. Allow 24 hours before any water can touch it.
Front view with door up
Side view with door up
Inside view through the side
Inside view through the front
Step 8:
Lighting. We need to install the lighting. For this install, you will need a screwdriver, drill bits, 4 4Ã?¢ââ??¬Ã? screws, 1 3Ã?¢ââ??¬Ã? DWV coupling, the 2 porcelain fixtures, extension cord, and extra extension cord.
Start by taking your 3Ã?¢ââ??¬Ã? DWV coupling and sawing it in half creating 2 cylinders.
Wire-up your porcelain fixtures using the extension cord (cut off the side you extend with keeping the side you plug into your wall). Use the directions! Put the coupling on the back of the fixture, and screw onto the ceiling. Thread the cables through a small wall you need to drill on the back of the cage. Use staples to staple the extension cord so it looks sleek and nothing can pull on it.
Step 9:
Decorate your cage. Add what ever you want to it. DonÃ?¢ââ??‰â??¢t worry about chipping of the paint.
If you wheel it outside for the winter, just cover it up with a tarp leaving the dÃ?Æ?Ã?©cor inside. I did take the lighting out though.
There ya have it! Your cage is finally done!
 :wink: :lol: